In 30 seconds
The class
The Chanter fights at close range with a staff, but their value goes beyond personal damage. They support the group with combat buffs, help remove debuffs, heal, and protect allies. Their healing is limited compared with a Cleric, so in a group you need to keep attacking and use defensive skills at the right time.
When playing solo, the Chanter can hold their own with healing and defensive effects. In a group, choose between extra damage and protection based on the group composition and boss mechanics: one setup does not have to fit every run.
Your job in combat
What you need to know
- Skill level is not the main goal by itself. Raise skills to unlock specializations, then gain further levels from Daevanion boards and other available systems.
- Spinning Strike, Impactful Crush, and Marchutan's Wrath open a short window for Dark Crush. Use the combo while the window is active.
- Onslaught restores MP, while Incandescent Blow spends it. If you run out of MP faster than you recover it, change the specialization or use Onslaught more often.
- With the right specialization, Rushing Smash resets its cooldown after you kill an enemy. This helps you move between weaker enemies, but does not help against a boss.
- Gust Rampage is meant for a staggered target. Do not build your regular rotation around it unless the fight gives you that opening.
- Stigmas gain effects at levels 5, 10, 15, and 20. A set raised evenly to a threshold is often more useful than putting a few extra levels into skills between thresholds.
How skills level up
Skill points can raise skills to level 10. Further levels come from other systems, including Daevanion boards. Each active skill has an upgrade node on each of the four Global boards, for up to four additional levels in total; more sources become available later. Do not expect skill points alone to take a skill to 20.
Specializations unlock as a skill gains levels. For regular active skills, the important thresholds are 8, 12, 16, and 20: they add options, and some powerful options only appear at later thresholds. Do not level skills at random: decide in advance which effect your build needs.
Leveling from 1 to 45
- 1–7Raise Onslaught and Incandescent Blow for your regular attacks. Onslaught restores MP and Incandescent Blow spends it; alternate between them and watch your reserves.
- 8–11At the first specialization, choose MP recovery for Onslaught and lower MP costs for Incandescent Blow if you are running short. Take Spinning Strike for damage; against a single target, choose its damage option.
- 12–15Raise Rushing Smash to the specialization that resets its cooldown after a kill. This speeds up clearing. Choose guaranteed critical hits for Dark Crush; choose an extra use of Recuperation if the group needs it.
- 16–21Spend extra points on your main attacks and passive buffs. Keep a regular heal on your bar until the first stigma unlocks.
- 22–26Your first of four Global stigma slots opens. Equip a persistent group buff if you spend most of your time in groups.
- 27–31Your second slot opens. Add a movement-speed buff or a skill that fits your chosen role.
- 32–36Your third slot opens. Choose a group damage buff or a target defense reduction for an organized group.
- 37–45Your fourth slot opens. Keep an offensive option for routine PvE, and save a defensive stigma for fights where the group needs more survivability.
Active skills and specializations
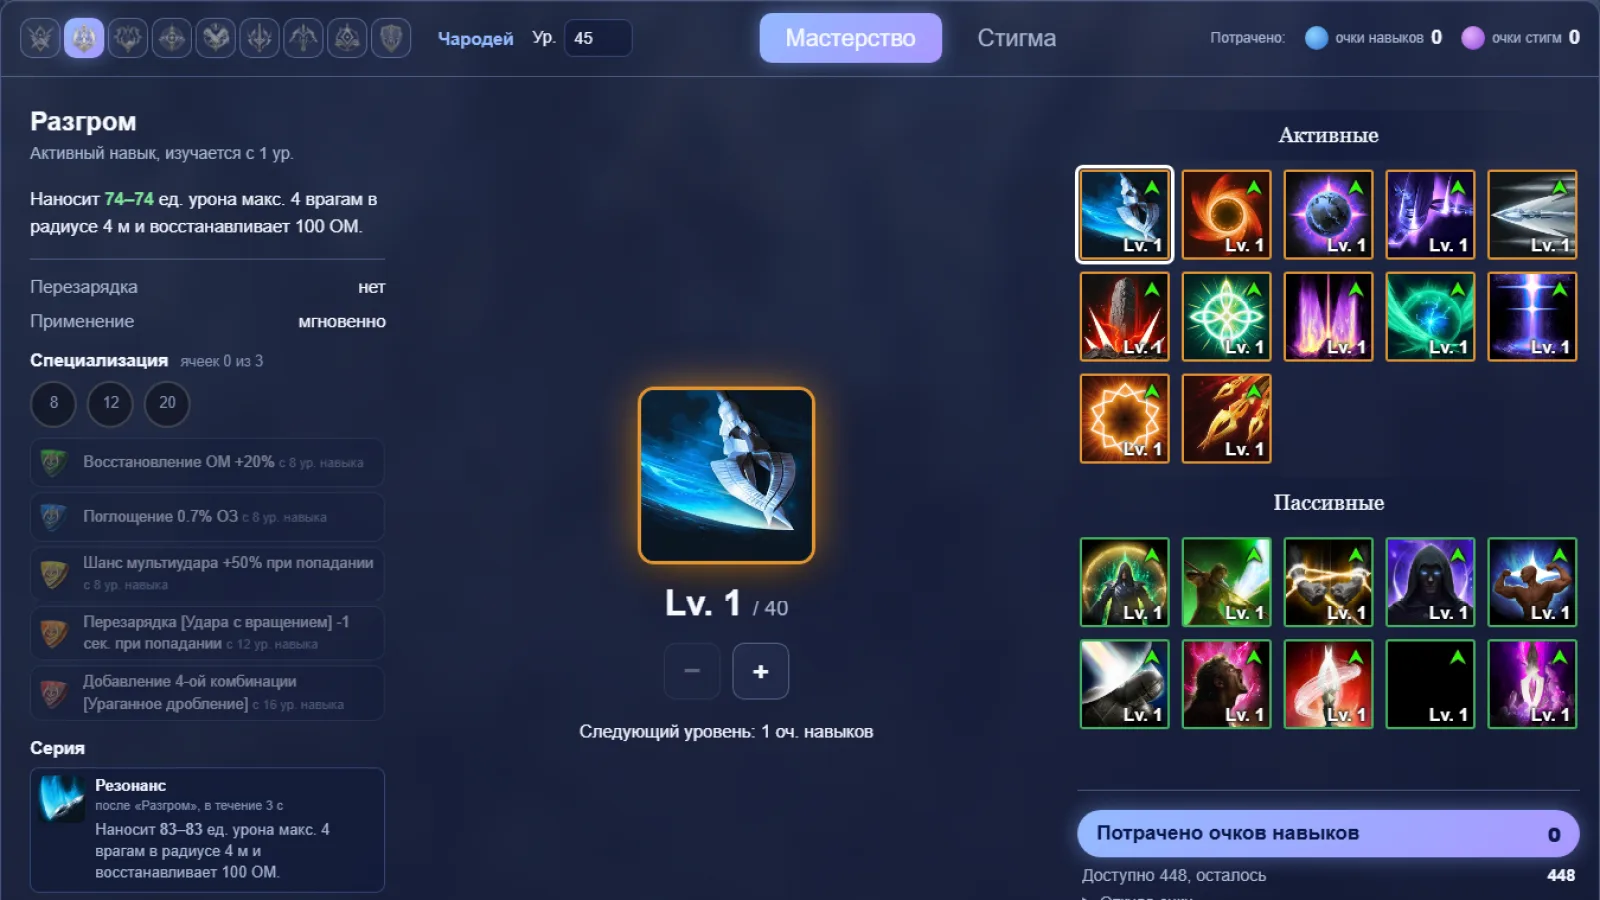
The specialization numbers below refer to the options in the game window. Select them manually after spending points: skill level alone does not always activate the effect you want.
Core damage and movement
 OnslaughtActiveDeals 74-74 damage to up to 4 enemies within 4m and restores 100 MP.
 +20% MP restored
 Incandescent BlowActiveDeals 160-160 damage to up to 4 enemies within 4m.
- -20% MP consumed
 Spinning StrikeActive · CD 30sSelects a target within 20m and deals 2347-2347 damage to up to 4 enemies nearby. Increases the caster's Critical Damage Boost by 15% for 30s on hit. Stacks up to 2…
- -5s cooldown
 Dark CrushActive · CD 5sDeals 215-215 damage to a target within 20m.
 Critical Hit on hit
Dark CrushActive · CD 5sDeals 215-215 damage to a target within 20m. Removes [Dark Crush] cooldown
 Impactful CrushActive · CD 15sDeals 224-224 damage to a target within 20m. Has a 60% chance to inflict Stun for 3s.
- Changes to mobile skill
 Rushing SmashActive · CD 15sRushes at a target within 20m and deals 112-112 damage to up to 4 enemies and restores 100 MP.
 Resets cooldown on defeating an enemy
 DefianceActive · CD 60sRemoves Stun, Knockdown, Airborne, Grab, Frost, and Fear from the caster and grants Tenacity for 5s.
- Restores 10% HP on using [Defiance]
Healing and situational attacks
 RecuperationActive · CD 15sRestores 183-201 HP and removes 1, 1 debuff(s) for the caster and party members within 40m. Restores 183 HP every 2s for 8s.
- +1 consecutive use and Heal over Time can stack up to 2 times
RecuperationActive · CD 15sRestores 183-201 HP and removes 1, 1 debuff(s) for the caster and party members within 40m. Restores 183 HP every 2s for 8s. Removes up to 2 debuffs
RecuperationActive · CD 15sRestores 183-201 HP and removes 1, 1 debuff(s) for the caster and party members within 40m. Restores 183 HP every 2s for 8s.- +5% HP restored
 Gust RampageActiveDeals 120-120 damage to a target afflicted with Stagger within 4m.
- Absorbs 5% HP
 Wave BlowActive · CD 20sDeals 538-538 damage to a target afflicted with Stun within 4m and inflicts Knockdown for 3s.
- --15% target's PvE Damage Boost and --7.5% PvP Damage Boost for 10s
Wave BlowActive · CD 20sDeals 538-538 damage to a target afflicted with Stun within 4m and inflicts Knockdown for 3s.- +6m Range
 Tremor CrushActive · CD 20sMove to a target within 10m and deal 260-260 damage with a 50% chance to inflict Stun for 3s after using [Dodge] or while flying.
- +50% Multi-Hit on hit
 Heat Wave BlowActive · CD 10sSelects a target within 4m and deals 345-345 damage to up to 4 enemies within 4m with a 40% chance to inflict Seal for 3s on Block.
- Up to +20% damage when more targets hit
Passive skills
Passive skills in order
 Attack Preparation
 Wind's Promise
 Inspiring Spell
 Protection Circle
 Earth's Promise
 Blessing of Life
 Impact Hit
 Raging Spell
- Survival Willpower
 Crossguard
Key passive skills
Attack PreparationPassiveIncreases the caster's PvE Damage Boost by 5.5%, PvP Damage Boost by 2.75%, Defense by 2%, and Accuracy by 100.Highest priority: increases PvE damage, Defense, and Accuracy; it is useful in PvP too.Wind's PromisePassiveIncreases the caster's Critical Damage Boost by 5.7% and has a 50% chance to deal 554-554 extra damage to the target on landing a Critical Hit.Increases Critical Damage and can add damage on a critical hit.Inspiring SpellPassiveIncreases the caster's Critical Hit by 100 and Perfect Chance by 0.5%.Increases Critical Hit and Perfect Chance.Protection CirclePassiveGrants a Protection Circle that lasts for 5s on landing an attack. Removes the Protection Circle at 10 stacks and grants Divine Barrier to the caster and party members,…Builds a defensive effect from your attacks and helps protect the group. Keep attacking to build stacks.Earth's PromisePassiveReduces the target's PvE Damage Tolerance by -5.4% and PvP Damage Tolerance by -2.7% for 5s each time an attack lands.Your attacks reduce the target's resistance to damage in PvE. Check that the group is not using an incompatible effect.After your main offensive passives, invest in defense and healing as needed. Blessing of Life is useful when you need more HP; Survival Willpower helps you survive control effects. Crossguard activates from a Block, so it is not a first choice for pure PvE damage.
Stigmas
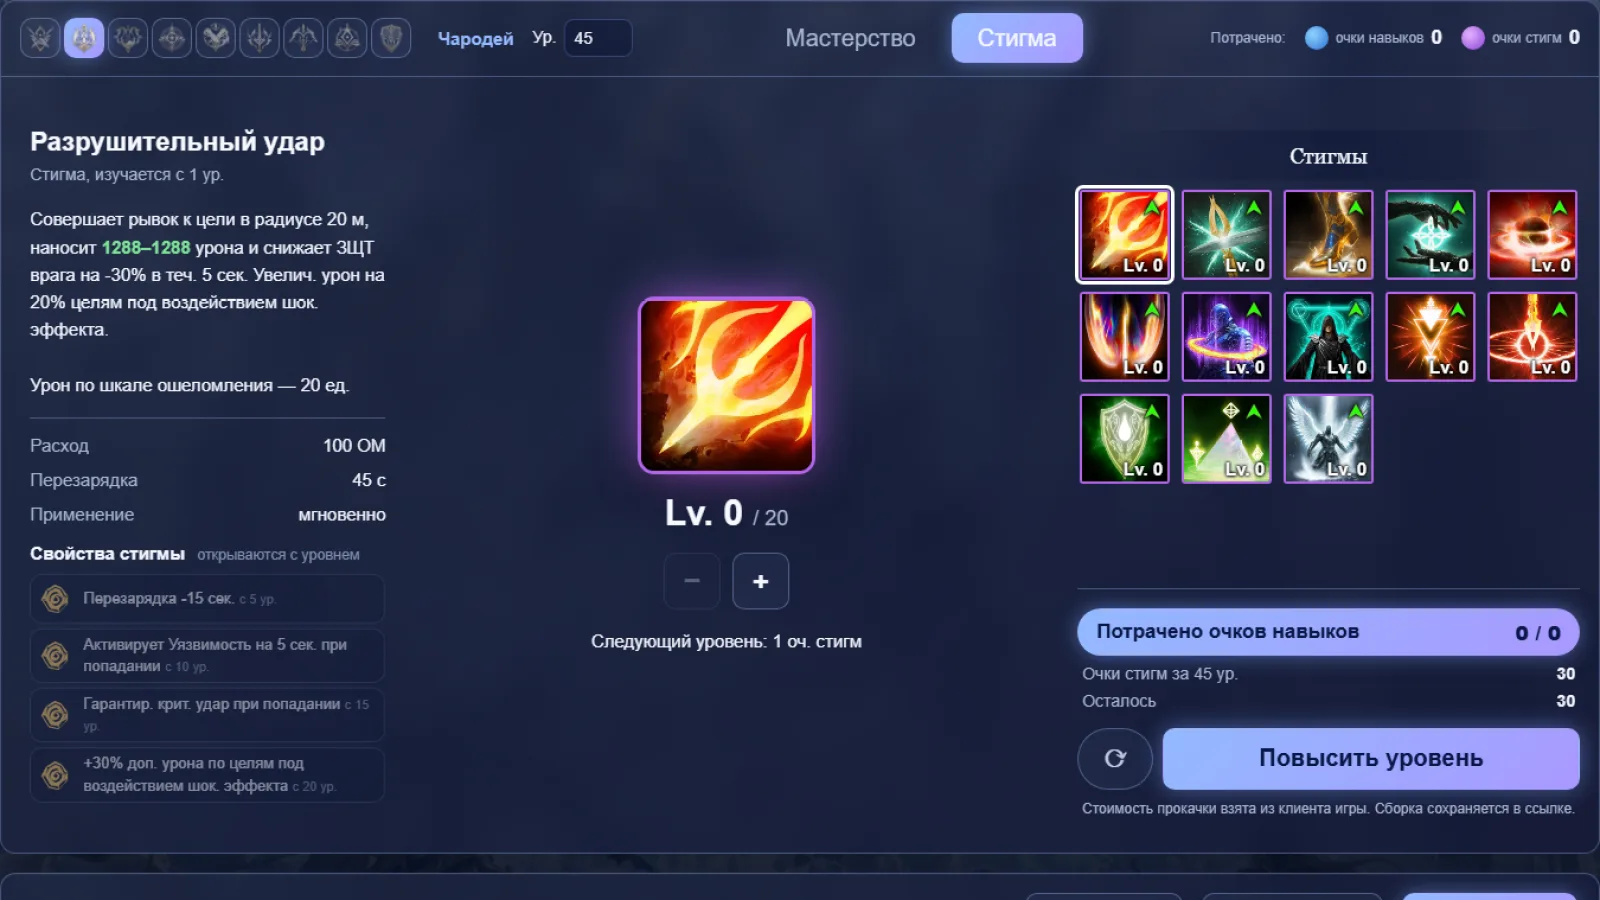
In Global, the Chanter has four slots, unlocked at levels 22, 27, 32, and 37. The slot count and unlock levels are confirmed by the Global reference; do not bring extra slots from other regions into this build.
Group foundation
 Undefeated MantraStigma · CD 5sIncreases PvE Damage Boost and PvE Damage Tolerance by 10.5% and PvP Damage Boost and PvP Damage Tolerance by 5.25% for the caster and nearby party members.Your main group stigma: increases the group's PvE damage and resistance to it. Work toward level 20; additional effects unlock at 5, 10, 15, and 20.
 Sprint MantraStigma · CD 5sIncreases Move Speed by 10.5% and grants a 15% chance to restore 127-140 HP on landing an attack to the caster and nearby party members.Increases the group's movement speed and can restore HP when you attack. Useful in dungeons and for moving out of danger zones.
 Power of the StormStigma · CD 120sIncreases Combat Speed by 20% and reduces skill cooldowns by -20% for 10s.Power of the Storm increases combat speed and shortens cooldowns; at higher levels, allies receive part of the effect. At level 5, its cooldown is reduced by 30 seconds.
 Fracturing BlowStigma · CD 45sRushes to a target within 20m and deals 1288-1288 damage and reduces their Defense by -30% for 5s. Increases damage by 20% to targets afflicted with an Impact-type…Fracturing Blow lowers the target's Defense. Take it when the group needs to break through a boss faster and another role can cover defense.
Choosing the fourth stigma
 Impeding AuthorityStigma · CD 90sGrants a Protective Shield that blocks damage equaling 16% of Max HP for 20s to the caster and nearby party members within 40m.Impeding Authority creates a shield for the group. Choose it for heavy incoming attacks.
 Barrier SpellStigma · CD 180sPrevents the HP of the caster and party members within 40m from falling below 10% for 3s.Barrier Spell prevents group HP from dropping below 10% for its duration. Save it for a fight with a dangerous damage spike.
 Guardian BlessingStigma · CD 300sIncreases the caster's Max HP by 5.4% for 300s and immediately restores 5.4% HP.Guardian Blessing increases your HP; an option for solo play or personal survivability.
 Marchutan's WrathStigma · CD 30sSelects a target within 20m and deals 1384-1384 damage to up to 4 enemies within 4m.Marchutan's Wrath adds an attack skill and opens a window for Dark Crush. Take it when the group has enough protection.
 ObliterateStigma · CD 60sDeals 1078-1078 damage to up to 4 enemies within 4m of the target, with a 50% chance to inflict Knockdown.Obliterate deals damage and adds 50 points of stagger gauge damage. Useful when the group needs to fill that gauge faster.
Stigma levels unlock extra properties at 5/10/15/20. First, bring important skills to the next useful threshold. Then invest in Undefeated Mantra; raise it toward 20 if you have enough points. It makes sense to take Power of the Storm to 5 first for the cooldown reduction, then decide what matters most to your group: a stronger buff, damage, or defense.
PvE: solo and group
Solo
Combine Onslaught for MP recovery with Incandescent Blow and your strong skills. Against weak enemies, use Rushing Smash with its cooldown reset after a kill to move on to the next target. Save Guardian Blessing and Recuperation for when your health drops; there is no need to spend defensive skills on every easy enemy.
Group
The Chanter's group support is built mainly around buffs and steady attacks. Undefeated Mantra gives the group a PvE buff, Sprint Mantra helps with movement, and Power of the Storm opens a window of combat speed and shorter cooldowns. Use it before a coordinated group damage window when possible. Note that Undefeated Mantra does not stack with the Cleric's corresponding buff: the higher-level skill effect applies, and if they are equal, the Chanter's effect takes precedence.
Save Recuperation for when it is really needed: it heals the group, and the right specialization lets you use it twice or remove debuffs. Your attacks also help trigger passive defensive effects. If the fight calls for a dedicated shield, replace the offensive fourth stigma with Impeding Authority or Barrier Spell.
Group buff priority
- Before the fightActivate Undefeated Mantra and Sprint Mantra.
- Before the damage windowCoordinate Power of the Storm with the group's attack.
- During the fightKeep attacking to deal your own damage and build the defensive effect.
- When danger hitsRemove a debuff or heal allies; save your shield for the mechanic you chose it to handle.
PvP: what changes
In PvP, skills that work on staggered NPCs are less useful, while control, breaking control, and personal defense matter more. Switch Defiance's specialization to HP recovery or longer protection, and choose attack effects that ignore Block and Evasion if they are available. Use Impactful Crush and Wave Blow for situational control; Heat Wave Blow is available after a successful Block, while Tremor Crush follows an Evasion or can be used in flight.
You can replace the offensive fourth stigma with defense if an opponent is quickly draining your health. Guardian Blessing helps you survive focus fire; Impeding Authority or Barrier Spell are for fights where protecting several allies decides the outcome. The client files and reviewed references do not confirm exact PvP stat thresholds, so tune them to your opponents and current gear.
Rotation and macros
The regular chain revolves around using Dark Crush right after skills that open its window. Start with Spinning Strike, then use Dark Crush. Repeat the same logic after Impactful Crush and Marchutan's Wrath if you have chosen it. Use Onslaught and Incandescent Blow between powerful skills: the first sustains your MP, the second spends it.
In a group, keep your stigmas active and use Power of the Storm before the group's damage window. When solo, heal as needed, and add Gust Rampage and Raging Spell against a staggered target.
Setting up a macro
- Start without a macroPlay manually to learn which skills spend MP, when Dark Crush is available, and when you need to heal.
- Simple setupPut repeatable attacks in a macro line and leave healing, debuff removal, and defensive skills on separate buttons.
- Expand itAdd powerful skills to the line one at a time and check that the macro does not stop you from using Dark Crush on time or interrupting your attack to help the group.
- Later buildRemove Rushing Smash from the repeating attack line: it will not reset from a kill on a boss and may delay the attacks you need.
Set the macro delay based on how reliably the skills activate. References differ between a simple early line and a more complex later setup; start simple and add automation only after you understand the rotation.
Daevanion
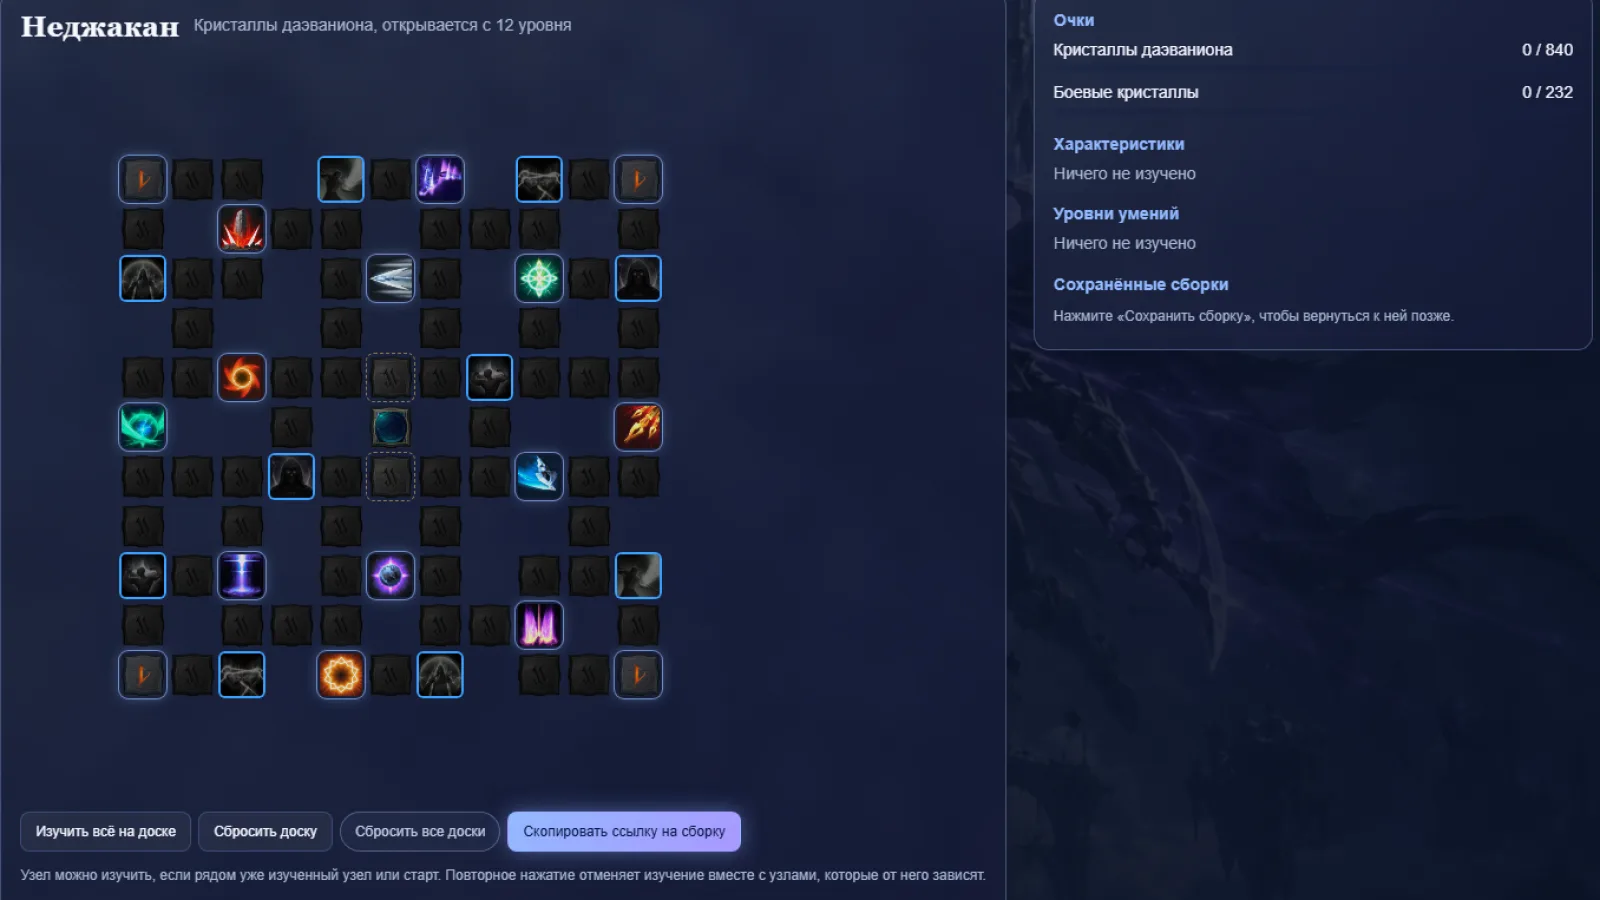
Each of the four main Global boards has upgrade nodes for active skills; together, the boards can raise each skill by up to four levels. The Chanter's boards and unlock levels are confirmed by the client: Nezekan at 12, Zikel at 20, Vaizel at 30, and Triniel at 40. The Azphel board unlocks at level 45 and is for PvP.
Board priorities
- Nezekan, 12Path to the Combat Speed and cooldown reduction nodes. Pick up levels for the active skills you need along the way.
- Zikel, 20Prioritize damage increase nodes in the offensive branch; leave defensive nodes for later.
- Vaizel, 30In the offensive branch, take Critical Damage increase nodes before defensive ones.
- Triniel, 40If your build benefits from frequent multi-hits, take the relevant offensive nodes; add defense as needed.
- Azphel, 45PvP board: choose PvP damage increase if you focus on damage, or PvP damage resistance if you need to survive.
After the important offensive stat nodes, pick up active skill levels that bring you closer to the next specialization. See the specific nodes on the Chanter Daevanion board; do not spend rare points on a long detour for a defensive bonus before taking an available offensive target.
Gear and stats
Raise item levels and use weapons and armor suited to a Chanter. When choosing between items, compare more than their level: consider whether a set helps you maintain a long attack sequence and keep MP available for healing. Do not sacrifice all your survivability for damage if you often have to stop fighting to recover.
A practical PvE guideline is to make your rotation sustainable first, then strengthen it. Combat Speed increases how often you can repeat attacks; Critical Hit and Critical Damage support offensive effects, while Multi-Hit Chance can make effects trigger more often. If you run out of MP, resource recovery matters more than a small damage gain. Check Accuracy against your combat results too, but available sources do not confirm a specific Global cap.
| Priority | What to check | When to change priority |
|---|---|---|
| Sustainable rotation | Enough MP for attacks and needed healing | If your resource drops, choose MP recovery |
| Combat Speed | Whether your main attacks feel frequent enough | If mana is stable, improve speed |
| Critical Hit and Critical Damage | How often critical-hit effects activate | If critical hits are rare, improve Critical Hit first |
| Multi-Hit and damage increase | Whether they give a noticeable gain for your build | Compare against the same target |
| HP and defense | Whether you can keep attacking through boss mechanics | Increase them if you die often or lose time healing |
Magic Stones
Choose stones for the same goals: damage and offensive stats for routine PvE, or HP and defense if they help you survive mechanics without losing time getting back into the fight. Do not rework your stones for one impressive-looking stat before you know what your build needs.
Global materials do not provide a verified numerical cap for a Chanter's Accuracy, critical hit, or Combat Speed. Compare results on a training target or in the same fight; do not transfer numbers from another game version.
Arcana
Arcana can add skill levels, but the skills that roll depend on the card type. The client skill table for Arcana confirms the Chanter's candidate skills, but does not guarantee a particular result for a specific item.
When choosing, first look for levels on skills you actually use: Spinning Strike, Dark Crush, Onslaught, Incandescent Blow, Attack Preparation, and Wind's Promise. If you are short on mana, supporting Onslaught is more useful than gaining a level on a skill you never press. Do not spend resources chasing a particular combination before checking the skill list on the Arcana itself in the client.
Pet breeds
The client data lists Cognia, Wild, Viridis, Varian, and Special breeds. For a regular build, choose the pet stats that fit your needs: offensive lines if you need more damage, or HP and defense if you cannot reliably handle mechanics.
For the Special breed, the client allows Double Chance, damage increase, Critical Damage increase, and several other offensive options in the fourth slot. Other breeds have different slot pools. The references do not confirm ideal reroll values or a universal order for locking lines; check the options on your own pet and do not lock a line just because someone else used it.
Global: what we compared
| Question | Where recommendations differ | How to apply it in Global |
|---|---|---|
| Group role | One approach focuses on personal damage when a Cleric is present; another keeps the standard buffs and healing even without one | Keep Undefeated Mantra and Sprint Mantra. Choose healing and a defensive stigma based on mechanics and group agreement. Undefeated Mantra does not stack with the the Cleric's corresponding buff; the client confirms this. |
| MP recovery | An early build recommends strengthening Onslaught; a later one allows an offensive option once you have enough resources | While MP is running low, keep the recovery specialization. Switch to a shorter cooldown or extra damage only after confirming your rotation is sustainable. |
| Fourth stigma | For damage, recommendations suggest an offensive skill; for difficult fights, a shield, preventing a critical drop in HP, or extra healing | Use the offensive option in an easy fight. Before a difficult mechanic, equip the defense that addresses it. Global has four slots at levels 22/27/32/37. |
| Later macro | The early advice is one simple line; the later advice is an expanded attack sequence with manual support control | Learn to play manually, then add repeats gradually. Keep healing, debuff removal, and defense on separate buttons. |
| Stats | One recommendation emphasizes Critical Damage; another emphasizes Critical Hit chance, Combat Speed, and Multi-Hit | First check that your MP and rotation are sustainable. Then compare offensive stats against the same target; the client does not confirm one numerical cap for Global. |
The number of stigma slots and their unlock levels, skill names, specializations, buffs, and Daevanion nodes have been checked against the Global client. Values that the client does not confirm are not included in this guide. ## Common mistakes
- Spending all your MP on Incandescent BlowYour rotation stops and you have no resource left to heal → add Onslaught and choose MP recovery.
- Using Dark Crush outside its windowYou lose the chain after a powerful attack → use it right after a suitable skill.
- Leaving buffs inactiveThe group loses the Chanter's support → activate persistent stigmas before the fight.
- Healing as soon as it is off cooldownAn important debuff removal or heal may not be ready → use them when the situation calls for it.
- Keeping the same stigma for every fightThe group may lack needed defense or damage → choose your fourth slot before the run.
- Leaving Rushing Smash in a late-game boss macroIt will not reset without a kill and delays other actions → remove it from the attack line.
- Copying someone else's stat valuesYou may lose resources or survivability without a clear gain → check changes on your own gear and avoid unconfirmed thresholds.
Checklist
Chanter ready
- Onslaught, Incandescent Blow, Spinning Strike, and Dark Crush are on your bar.
- Onslaught restores enough MP for your chosen attack pace.
- You use Dark Crush during the window opened by powerful skills.
- Attack Preparation and Wind's Promise are among the first passive skills you level.
- Undefeated Mantra and the required stigmas are chosen for the group; you have accounted for its incompatibility with the Cleric's Protection Light.
- Your fourth stigma fits the upcoming fight: damage, stagger, or defense.
- Recuperation is set up for direct healing or debuff removal as needed.
- Power of the Storm is coordinated with the group's damage window.
- Your macro does not contain healing or defensive skills that you need to press manually.
- You have taken the available offensive nodes and the active skill levels you need on Daevanion.
Key takeaway
The Chanter supports the group with buffs and steady damage; it does not replace a Cleric. Watch your MP, link Dark Crush with powerful attacks, and save healing for when it is needed. Global's four stigma slots let you build steady support and swap the last slot for a specific fight. Start with a simple rotation, then tune your macro and stats to what your group needs.
Comments