In 30 seconds
Class overview
The Cleric is more than a healer, but is not a dedicated damage class. The Cleric supports the group with healing, defensive effects, and useful enemy debuffs, and deals damage during safe openings. In a dungeon, prevent deaths and help the group handle mechanics first, then use free moments to attack.
This class suits players who watch health bars and debuffs, prepare strong heals in advance, and can quickly switch from attacking to helping the group.
What you need to know
- Every skill has specializations. Choose them for the fight instead of copying a whole setup: the client shows options at the skill levels listed on the skill card.
- Keep healing, Defiance, and defensive skills available for manual use. When to use them depends on the situation.
- Attacking helps the group while healing is not needed. Stop your attack cycle if an ally is close to dying or the group has a dangerous effect.
- Daevanion points raise skill levels; they do not replace specialization choices. Global boards have fewer regular nodes, but the same logic applies; each active skill appears once on each board.
- MP costs become especially noticeable in long fights. For your basic cycle, keep at least one specialization that helps with your resource if you would otherwise run out of MP.
When evaluating a skill, look beyond its damage number: healing amount, number of hits, MP cost, cooldown, use while moving, control, and trigger conditions all matter. One specialization may deal more damage, while another is more reliable for the group.
How skills grow and what to level from 1 to 45
Start with two skills for repeatable attacks, then develop Condemnation and your healing. Early goals are level 12 for Earth's Retribution, Chain of Torment, Lightning Strike Scattershot, and Healing Light; Judgment Thunder can stay around level 8–10 while points are scarce. Use this as a priority guide: the number of points you have learned depends on your quests and rewards.
Leveling priorities
- 1–11 — Damage and MP foundationRaise Earth's Retribution and Chain of Torment first: they are convenient repeatable attacks. If you run low on MP, choose the MP recovery specialization for Earth's Retribution.
- 12–21 — First reliable cycleBring Earth's Retribution, Chain of Torment, Lightning Strike Scattershot, and Healing Light to level 12. Develop Condemnation next; keep Judgment Thunder around level 8–10 if other skills need the points. Skill levels 8, 12, and 20 unlock their corresponding specialization slots.
- 22–31 — Stigmas and healingThe first two stigma slots unlock at levels 22 and 27. Level your main healing skills, especially Healing Light and Radiant Recovery; the third slot unlocks at level 32.
- 32–45 — Complete your setupThe fourth stigma slot unlocks at level 37. By level 45, after regional quests, distribute your remaining points across attacks, group healing, and defense. Do not leave an important heal at a low level for a few secondary attacks.
- After 45 — SpecializePut further levels into your chosen roles: healing for groups, damage for solo, and control and survival for PvP. After gaining Daevanion points, check your skill levels and specializations again.
If you are following the story and often play in a group, level your healing faster before a difficult dungeon. If you spend most of your time questing solo, strengthen your attack cycle first, but keep your healing high enough to handle mistakes and unexpected elite enemies.
Active skills and specializations
The names below are from the Global client. Specialization options and levels are shown on the skill cards; these descriptions do not replace checking the effects in the client.
Core skills and specializations
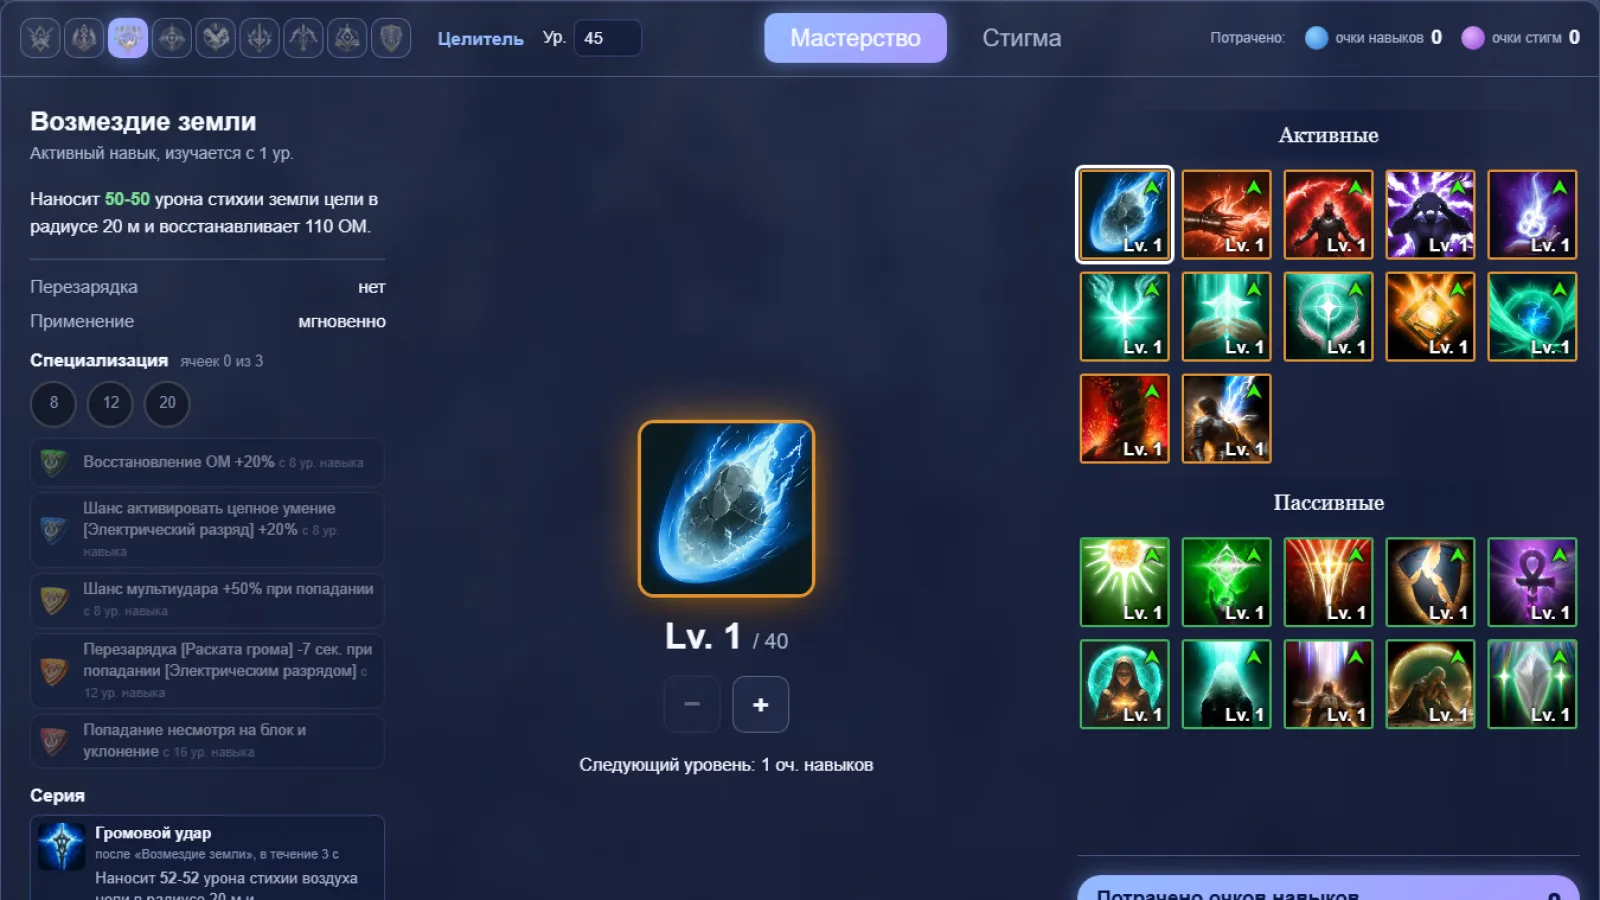
 Earth's RetributionActive · level to 12Deals 50-50 Earth damage to a target within 20m and restores 110 MP.
 +20% MP restored
 +20% [Discharge] Chain Skill trigger chance
 Chain of TormentActive · CD 20s · level to 12Selects a target within 20m and deals 138-138 Earth damage to up to 4 enemies within 4m of the target. Reduces enemy PvE Damage Tolerance by -5%, PvP Damage Tolerance by…
- +3s Damage over Time
 Has a 20% chance to inflict Knockdown on the target for 3s
 Debilitating MarkActive · CD 10s · level to 8Selects a target within 20m and deals 59-59 Wind damage to up to 4 enemies within 4m of the target. Reduces enemy PvE Damage Boost by -5%, PvP Damage Boost by -2.5%, and…
- --15% target Defense for duration of Damage over Time
 Judgment ThunderActive · level to 12Selects a target within 20m and deals 81-81 Wind damage to up to 4 enemies within 4m of the target.
- Deals up to 12% more damage when less targets are hit
 Activates [Divine Punishment] 1 extra time
 BoltActive · CD 45s · level to 12Selects a target within 20m and deals 987-2963 Wind damage to up to 4 enemies within 4m of the target.
- +30% Skill Speed
- Critical Hit on hit
 Healing LightActive · CD 6s · level to 12Restores 192-211 HP to the caster and the party member with the lowest HP within 40m.
- +2 consecutive uses
- -2s cooldown
 Radiant RecoveryActive · CD 12s · level to 12Restores 379-417 HP and removes 1 debuff for the caster and party members within 40m.
- -3s cooldown
- Removes up to 2 debuffs
 Divine AuraActive · CD 30s · level to 12Summons a Divine Aura near the caster that lasts for 5s. The Aura is stationary and periodically deals 394 Earth damage to a selected target within 20m.
- +50% [Divine Aura] attacking speed
- Changes to AoE Skill
 CondemnationActive · CD 3s · level to 12Selects a target within 20m afflicted with Chain of Torment and deals 325-325 Earth damage to up to 4 enemies within 4m of the target.
- Up to +12% damage when less targets hit
- Multi-Hit on hit
 Lightning Strike ScattershotActive · level to 12Deals 147-147 damage to a target afflicted with Stagger within 20m.
 Multi-Hit on hit
- -1s all skill cooldowns on hit
 Prayer of AmplificationStigma · CD 60s · level to 5Increases Attack by 20% for 10s.
 +20% PvE Damage Boost and +10% PvP Damage Boost
 Earth PunishmentStigma · CD 30s · level to 5Deals 1186-1186 Earth damage to a target within 20m and 1186 damage every 1s for 10s.
- [Condemnation] lands as a Critical Hit on targets afflicted with [Earth Punishment]
 Noble AuraStigma · CD 60s · level to 5Summons a Noble Aura near the caster that lasts for 300s. The Aura follows the caster and attacks their target together.
- +200 Aura Critical Hit
What to use
Earth's Retribution — a frequent instant attack and part of weaving between other skills. The early MP recovery specialization is useful while your resource pool is small. Later, you can replace it with the chain-skill chance; that helps reduce Bolt's cooldown more often.
Chain of Torment — an attack with damage over time that sets up Condemnation. In dungeons, lowering the target's damage resistance is useful; in fights where control is dangerous, choose the knockdown option.
Debilitating Mark — applies damage over time, and the appropriate specialization lowers the target's defense. It is useful for sustained attacks and setting up a damage window; in PvP, options that work against players take priority.
Judgment Thunder — a single-target attack and control tool. At higher levels, you can choose an additional Divine Punishment trigger; in PvP, imprisonment can sometimes be more useful.
Bolt — a powerful charged attack. Faster casting is a convenient choice; against a boss, the single-target specialization increases damage. The accuracy option is useful if the attack often misses.
Healing Light — a frequent heal for one target. Several consecutive uses give you a reserve for a sudden drop in health; additional HP recovery strengthens each use. When the group needs a cleanse, use the appropriate effect-removal specialization.
Radiant Recovery — a powerful group heal that also removes debuffs. Cooldown reduction is convenient for regular fights; choose increased healing received before a heavy damage phase. Higher levels add more HP recovery.
Divine Aura — an attack that remains on the field and deals damage. Faster triggers suit a boss, the area option suits a group of enemies, and increased duration helps when you need to keep the aura active.
Lightning Strike Scattershot — an attack against a target and a useful way to reduce other cooldowns when it hits. Against a boss in a group, use it while the target is vulnerable; the movement option is more convenient when you need to move.
Keep Defiance separate from your macro: it helps you escape a dangerous state. Use Salvation and other major healing skills in response to the situation, not automatically.
Passive skills
First strengthen passive effects that support both healing and repeatable damage. This is more useful than a narrow bonus while your gear still lacks important stats.
Passive skill priorities
- First — Healing Enhancement and Empyrean Lord's GraceThe former increases healing based on ATK; the latter grants Critical Hit, a chance of a powerful hit, and bonus damage.
- Next — Empyrean Lords' BenedictionBlocks some attacks and restores HP when you block; useful in a defensive setup.
- Then — Immortal VeilDefense and Critical Hit Resistance are useful early, while your gear is weaker.
- After that — Prayer of Concentration and Earth's GraceThe first helps you survive when your health drops below half; the second grants Accuracy and Critical Damage amplification.
- For PvP — Survival Willpower and Heal BlockMore useful in fights against players than during regular leveling.
Warm Benediction increases Max HP and MP, so it provides extra survivability and resources. The client skill card shows +6% Max HP and +7% Max MP at level 1; do not confuse this with the “80%” health increase mentioned in some recommendations, as that percentage is not confirmed by the client card.
Consider the passive Critical Hit bonus alongside your gear: your Critical Hit chance is low at the start, so extra Critical Damage amplification may be less valuable than ATK or healing. Radiant Benediction helps the group recover health while attacking; it is more valuable when allies deal damage continuously.
Passive skills
 Healing EnhancementPassiveIncreases the caster's Heal Boost by 22.4% of Attack.Healing Enhancement — increases healing based on ATK
 Warm BenedictionPassiveIncreases the caster's Max HP by 6% and Max MP by 7.Warm Benediction — increases Max HP and MP
 Empyrean Lords' BenedictionPassiveIncreases the caster's Block by 200 and restores 53-64 HP on Block.Empyrean Lords' Benediction — increases block and restores HP when you block
 Empyrean Lord's GracePassiveIncreases the caster's Critical Hit by 100, Double Chance by 0.2% and deals 71-71 extra damage on landing an attack on a target.Empyrean Lord's Grace — grants Critical Hit, a chance of a powerful hit, and bonus damage
 Immortal VeilPassiveIncreases the caster's Defense by 2% and Critical Hit Resist by 100.Immortal Veil — defense and Critical Hit Resistance
 Heal BlockPassiveHas a 7% chance to reduce the target's Incoming Heal by 32% for 5s on landing an attack.Heal Block — a chance to reduce the target's healing received when attacking
 Prayer of ConcentrationPassiveForms a Protective Shield which blocks 424 damage and increases the caster's Heal Boost by 20% for 30s when HP is 50% or less.Prayer of Concentration — a protective shield and increased healing at low HP
 Earth's GracePassiveIncreases the caster's Critical Damage Boost by 10.5% and Accuracy by 100.Earth's Grace — increases Critical Damage amplification and Accuracy
 Survival WillpowerPassiveIncreases the caster's Status Effect Resist by 17%. Increases PvE Damage Tolerance by 12% and PvP Damage Tolerance by 6% for 5s when afflicted with Stun, Knockdown,…Survival Willpower — mainly for PvP
 Radiant BenedictionPassiveRestores 384-461 HP to the caster and party members within 40m on landing an attack.Radiant Benediction — periodic support for the group
Stigmas
Global has four stigma slots, at levels 22, 27, 32, and 37. Choose stigmas for your role, group composition, and type of fight, not for target-dummy damage.
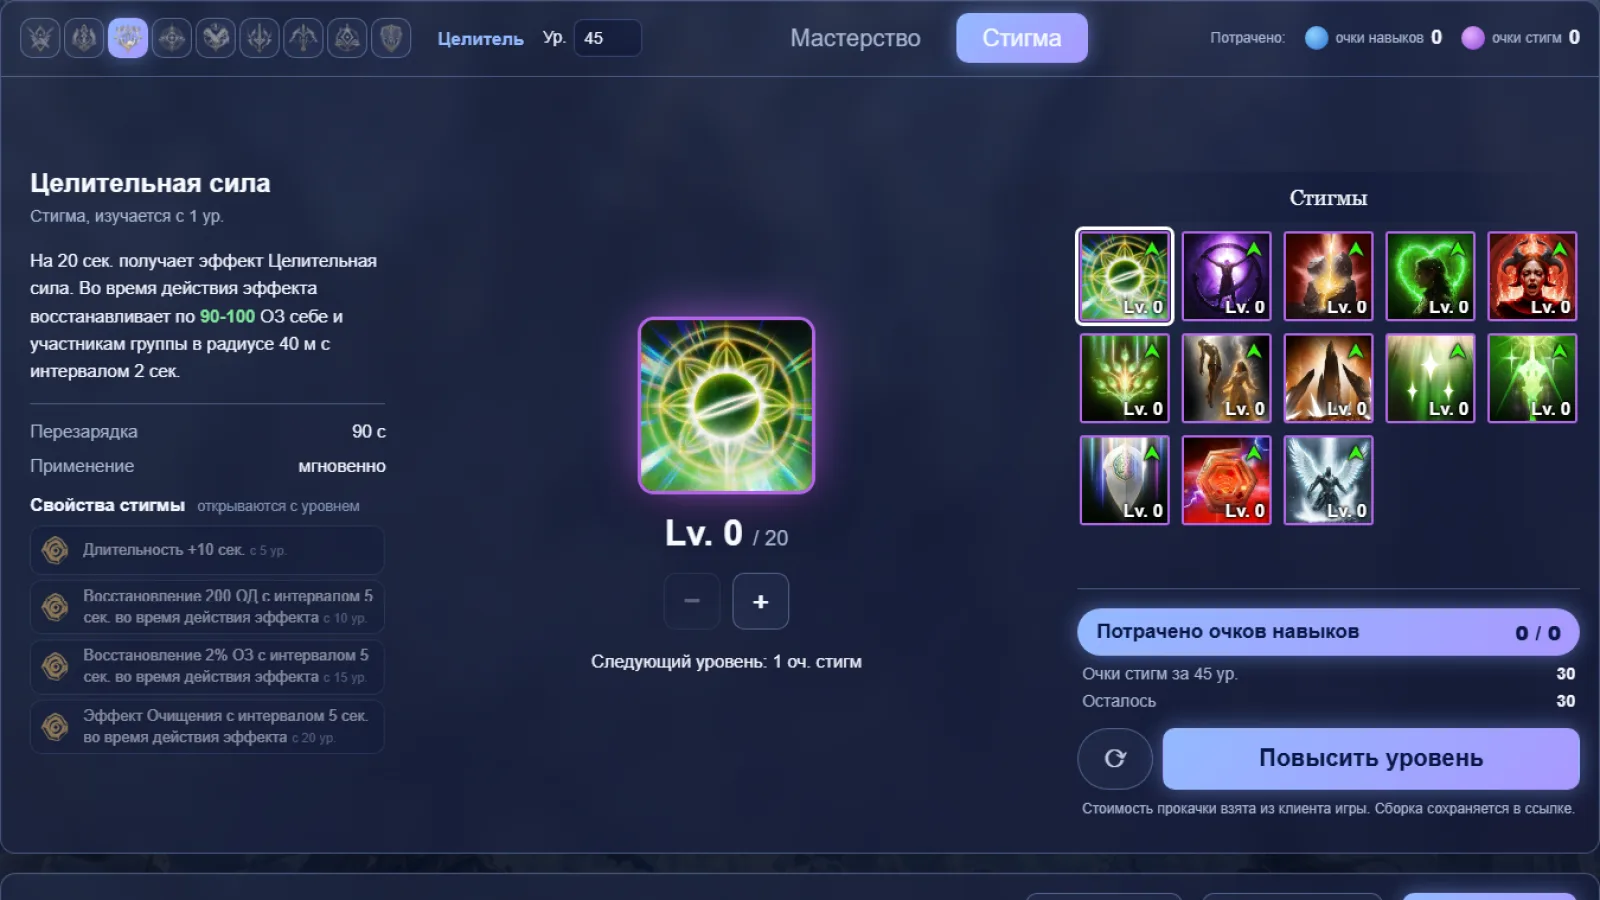
Group and solo setups
Support skills and role-based stigmas
Prayer of AmplificationStigma · CD 60s · level to 5Increases Attack by 20% for 10s.- +20% PvE Damage Boost and +10% PvP Damage Boost
 Light of ProtectionStigma · CD 5s · level to 5Increases PvE Damage Boost and PvE Damage Tolerance by 10.5% and PvP Damage Boost and PvP Damage Tolerance by 5.25% for the caster and nearby party members.
- +10% Incoming Heal
 Yustiel's PowerStigma · CD 60s · level to 5Increases PvE Damage Tolerance by 20% and PvP Damage Tolerance by 10% for 10s for the caster and party members within 40m.
- 10% Max HP Protective Shield
 AbsolutionStigma · CD 90s · level to 10Removes up to 2 debuffs and restores 1602-1762 HP to the caster and party members within 40m.
- Removes all debuffs
 Voice of DoomStigma · CD 60sSelects a target within 20m and deals 1100-1100 Earth damage to up to 4 enemies within 4m of the target. Deals 2862 damage every 1s and reduces enemy Incoming Heal and…Voice of Doom — limits enemy healing in PvP
Prayer of Amplification is a general choice for increasing damage, and leveling it also strengthens several passive effects. Earth's Retribution links the matching mark with Condemnation's guaranteed critical hit; this is a strong combination in an attack cycle. Light of Protection increases the group's damage and resistance in PvE and PvP when the party does not already have a stronger incompatible group effect. Yustiel's Power adds defense and resistance to negative effects. Voice of Doom is useful in PvP against healing and protective shields.
At the start of progression, you do not need to equip only healing stigmas: if the group is doing well, Prayer of Amplification and an offensive setup will speed up the fight. In a difficult dungeon or with an unreliable group, swap an offensive stigma for additional group support. Take resurrection when your group composition or agreement calls for it; using it by default can occupy a valuable slot at the wrong time.
Global: what we compared
| Question | Recent recommendations differ | How to apply this in Global |
|---|---|---|
| Earth's Retribution | One version prioritizes MP recovery; another triggers the chain skill more often to reduce Bolt's cooldown. | Take MP recovery if you run out of resources; take the chain-skill chance if you have enough MP and want damage. Both effects are in the client. |
| Healing and stigmas | One early setup uses Prayer of Amplification and temporarily swaps it for resurrection when needed; another recommends Prayer of Amplification, Light of Protection, and a strong group heal. | Choose for the fight's difficulty and your group. For solo or easy fights, use offensive stigmas; for a group taking heavy damage, use healing and group support. Global has only 4 slots, unlocked at 22/27/32/37. |
| PvE damage | One approach uses Noble Aura and Earth's Retribution; another builds a macro around Prayer of Amplification, Divine Aura, and attacks. | Use the offensive stigmas that fit your setup and strengthen your cycle. The client confirms their effects, but not one universally best setup. |
| Bolt | Faster casting is recommended for regular fights, fewer targets for bosses; an Accuracy option is also available. | Choose single-target damage against a boss, speed for faster use, and Accuracy if the attack misses. All three options are in the client. |
| Passive effects | One setup invests early in extra health; another in Critical Hit and the chance of a powerful hit. | Check the actual skill cards first: Warm Benediction gives +6% Max HP and +7% Max MP, while Empyrean Lord's Grace grants Critical Hit and a chance of a powerful hit; the claimed +80% health does not match the client data. |
| Node names | In the Daevanion data, one active skill and one passive skill have names that differ from the skill catalogue. | This guide uses the catalogue names, Earth's Retribution and Warm Benediction; compare nodes by id. |
| PvP stigmas | One recommendation keeps Voice of Doom against healing; for group PvP, another suggests replacing it with a strong heal. | Take Voice of Doom in a duel or when pressuring a healer; take Absolution in a group where allies need help. |
| Skill leveling order | One version starts with two repeatable attacks and Condemnation; another brings Chain of Torment, Lightning Strike Scattershot, and healing to 12 earlier. | For solo, strengthen the attack cycle first; for groups, level Healing Light and Radiant Recovery earlier, then add attack levels as points become available. |
PvE: group healing and solo damage
Group healing
Healing priority: first save the ally in immediate danger of dying; then keep the tank or several group members alive; after that, remove dangerous debuffs and heal less urgent targets. Do not heal a player who is avoiding healing or already using their own emergency skill unless the group is in immediate danger.
- Use Healing Light for frequent single-target healing, especially after a heavy hit.
- Save Radiant Recovery for several injured allies, a dangerous effect, or an expected damage phase. Cooldown reduction is convenient in regular fights; choose increased healing received before a heavy phase.
- Light of Regeneration helps support a target while you recover; choose a defensive or healing specialization to suit incoming damage.
- Absolution is a powerful group heal and debuff removal; use it when it is truly needed. Salvation briefly protects against damage and negative effects; it does not restore health.
- Radiant Benediction provides gradual support for the group, but does not replace a direct heal after heavy burst damage.
- If your group has a Chanter, check whether its group defensive skill is compatible before using the slot for yours. Free it for another heal if needed.
Resources and staying power
Before a heavy phase, check that you will have enough MP for healing and attacks afterward. Do not spend all your recovery skills early; use suitable skills while forced to move, and do not stand in danger for one last hit. An attack window only helps if you can use it without losing healing or missing a mechanic.
Solo damage
For quests and farming, use an offensive setup: Prayer of Amplification, Earth's Retribution, Noble Aura if you have room, and single-target or area-attack specializations for the enemies you face. Apply Chain of Torment and Debilitating Mark, then use Condemnation; weave in Earth's Retribution and Lightning Strike Scattershot, and charge Bolt when it is safe.
If you run low on MP, restore the MP recovery specialization for Earth's Retribution. If enemies surround you, choose the area effect for Divine Aura and mobility options on suitable skills. A solo setup is not appropriate for a group that expects you to heal continuously.
Stat priorities
For a group, first ensure enough survivability and reliable healing, then improve ATK: the client passive Healing Enhancement ties healing to ATK. For solo, raise ATK and damage while keeping enough Accuracy and HP for your content. For PvP, add defense, block, and resistance to Critical Hit and negative effects. There is no single numeric threshold for every boss: check the encounter and your gear.
PvP: what changes from PvE
In PvP, control, effect removal, survivability, and short damage windows matter more. Mobile and instant skills are more valuable than long attacks, and you should keep defensive cooldowns accessible. Do not stand still to charge an attack if your opponent is ready to interrupt it. Keep Defiance, Yustiel's Power, and major heals on separate keys; choose Voice of Doom when you need to limit an opponent's healing. In group fights, Absolution may be more valuable than an offensive stigma if allies often need cleansing and healing.
Skills designed for a single boss are not necessarily effective against players. For example, the PvP Debilitating Mark option reduces the opponent's damage amplification, while the PvE option helps the group defeat a target faster. Choose them for the content you are about to enter.
Rotation and macros
A short priority system is more useful to a Cleric than a fixed, long sequence.
Attack cycle
- 01 — PrepareCheck your MP and position; for a damage window, activate Prayer of Amplification and any other effects you need.
- 02 — Marks and debuffsApply Chain of Torment and Debilitating Mark, then Earth's Retribution if it is in your setup.
- 03 — Repeatable damageUse Condemnation, Judgment Thunder, Earth's Retribution, and Lightning Strike Scattershot when available; charge Bolt while the target does not require you to move.
- 04 — Return to healingWatch the group and interrupt your attack immediately when danger arises.
An in-game macro can make it easier to alternate attacks. One option used in Global setups puts Prayer of Amplification and Divine Aura in different sequences and triggers attacks with the left and right mouse buttons. The order depends on your interface and which skills are available; test the macro on a safe target before using it in a dungeon. Do not put healing, Defiance, control, movement, or defense in it.
- Keep your main attacks on keys that are convenient to alternate.
- Use long-cooldown skills manually so you can time them for a boss damage window.
- Stop the macro and continue manually when moving, changing targets, or running low on MP.
- When comparing macro settings, change only one delay or sequence at a time; the game and your connection affect how it feels.
Daevanion
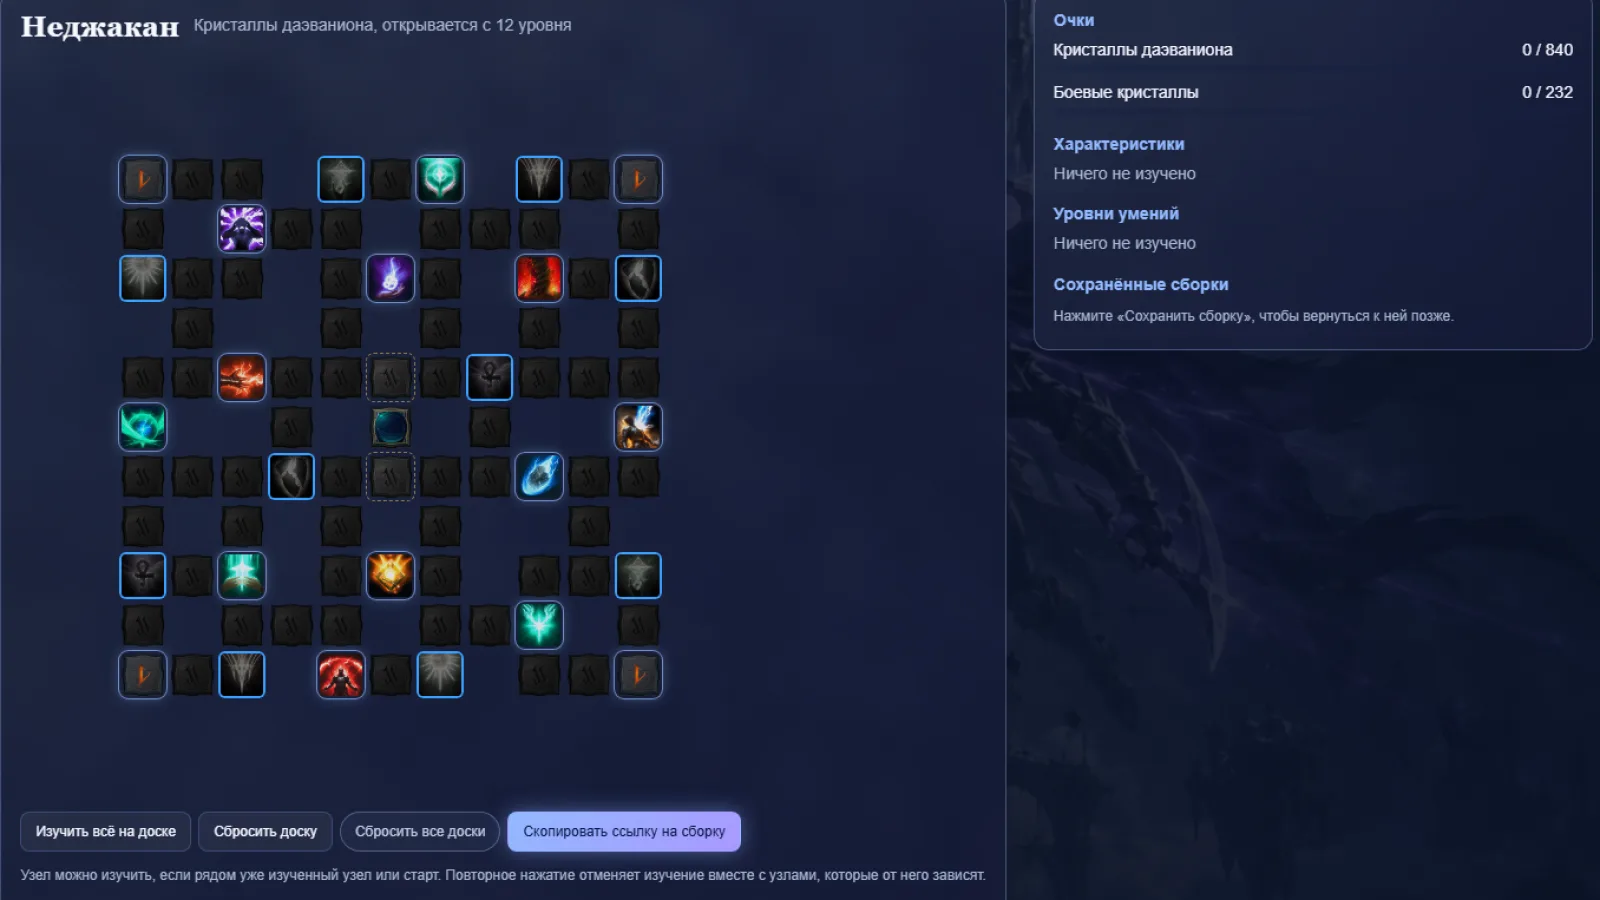
In Global, boards unlock at the levels shown in the client. Each of the first four boards contains nodes for class active skills; you can strengthen the skills you need on different boards to raise their levels and unlock your chosen specialization.
| Board | Unlocks at | What the Cleric should look for |
|---|---|---|
| Nezekan | 12 | Healing Light, Radiant Recovery, Chain of Torment, Condemnation, Earth's Retribution, and Lightning Strike Scattershot — raise the skills for your current role |
| Zikel | 20 | Keep strengthening core skills; for support, also look for Radiant Benediction |
| Vaizel | 30 | Return to your main attack and healing skills if they still need levels to reach a specialization threshold |
| Triniel | 40 | Choose the remaining nodes for your setup, then suitable defensive and offensive stats |
| Azphel | 45 | A separate PvP board; unlock it if you regularly fight other players |
Investment order
- First — Key active skillsLook for nearby nodes for Healing Light, Radiant Recovery, Earth's Retribution, Chain of Torment, and Condemnation; your role determines the choice.
- Next — Needed specializationsNodes that add important skill levels and unlock a needed specialization slot are usually more valuable than distant secondary stats.
- For healing — Defense and HPIf the group dies before you can heal, route through defensive and healing nodes.
- For damage — AttackFor solo and steady boss damage, invest in attack nodes and relevant stats.
- Later — Remaining nodesDevelop additional stats and PvP nodes once your main route is working.
Compare route costs in the interface: the same skill may be closer on another board. Do not copy a board from another region; Global boards are smaller and stat values differ. Client data does not define a universal order for specific nodes: route costs depend on node locations and the specialization you need. Choose the shortest path to the skills for your role. In Daevanion nodes, one skill has a different name from the skill catalogue; this guide uses the catalogue name.
Gear and stats
Choose items with an appropriate item level and avoid changing many stats at once. Do not reroll early gear indefinitely: first get an item you plan to use for longer, then improve it.
Stat priorities
- Healing and damageATK helps both roles: the Healing Enhancement passive increases healing based on ATK. For solo, add damage increase and boss damage if those lines are available on your gear.
- Reliable hitsAccuracy matters if your skills often miss; the exact threshold depends on the boss and current content.
- SurvivalHP, defense, and block help you survive mechanics, especially in a group with inconsistent damage.
- PvPCritical Hit Resistance, block, resistance to negative effects, and damage resistance help you survive an opponent's burst.
| Slot | What to look for first |
|---|---|
| Weapon and bracers | ATK, Attack Speed, Might, and Accuracy; if you have a choice, leave room for a skill line you use constantly |
| Accessories | Attack Speed, Might, and Accuracy; compare bonuses for frequently used attacks and heals on rings |
| Armor | Damage increase and ATK for an offensive setup; HP, DEF, and block if you die before you can heal |
| Boots | Movement Speed for mechanics and repositioning; choose the other lines for survivability |
At the higher end of Global, players take different approaches: stack block on armor for survival or keep more offensive lines because ATK also supports healing. Start with a reliable set, then change one line at a time and check the result in your content.
Soul Binding
Do not reroll every item. Develop your gear first and keep good lines; replace them with more role-focused lines when a new item improves your setup. ATK, Attack Speed, and damage are useful on weapons and accessories; for groups, add healing lines if available. On armor, compare ATK with HP, defense, and block based on what most often kills you. The client and the two Global sources did not confirm universal best lines for every slot.
Magic Stones
Socket Magic Stones into gear you plan to use for longer. First address an obvious stat shortage: ATK for general damage and healing, Accuracy if you miss, or HP/defense if you die often. For solo, consider damage increase; for a difficult group, choose more defensive lines. Do not chase a rare combination while your core set is still changing.
Arcana
Arcana are an additional set of cards with stats and skill bonuses. Global has five slots. Client data confirms card quality and item levels, but does not provide a universal list of “best for everyone” stats for the Cleric.
For healing, look for bonuses to frequently used healing skills: Healing Light, Radiant Recovery, Light of Regeneration, and Yustiel's Power. For solo, choose bonuses to Earth's Retribution, Condemnation, Judgment Thunder, Bolt, and Divine Aura. First collect the effects you need on cards of an available quality, then improve them while comparing their actual lines. If you play as your group's main Cleric, do not give up a useful healing skill for a small random damage bonus.
According to Global data, card item levels are 20 for common, 40 for green, 60 for blue, and 80 for unique cards; each enchantment level adds +1 item level, up to +5. Do not mistake these for skill levels: cards have separate stats and bonuses.
Pet breed
The client lists pet breeds as Cogni, Fera, Natura, Varia, and Special. The first three have similar breed stat sets, while special pets have a separate set of slots. Choose based on the breed understanding lines and your role, not the pet's name.
| Slots | What to look for among client options |
|---|---|
| 1 and 5 | ATK, boss damage increase, or damage increase — for general PvE and solo |
| 4 | PvE damage increase, damage increase, or Critical Hit damage increase — choose for your content |
| 3, 6, and 9 | Accuracy, block, or Critical Hit — based on missing stats and game mode |
| 2 and 8 | Max HP and other defensive lines — for extra survivability |
| 7 | recovery/defense — if survivability matters more than damage |
The client confirms the stat options by slot, but does not provide recommendations for specific values or when to lock a line. Do not lock an average line too early: later rerolls will cost more. As you level pets, unlock the available options, compare them with what your gear lacks, and lock only lines that are genuinely useful.
Common mistakes
- Healing everyone in turn→ A target in danger may die → Heal the person at risk first, then the others.
- Continuing to attack when the group is in danger→ An ally may die or a mechanic may fail → Stop the cycle and use the needed heal or effect removal.
- Taking only offensive stigmas into a difficult group→ You may lack healing or cleansing → Swap an offensive stigma before the dungeon.
- Keeping MP recovery when you have enough resources→ You lose potential damage → Check your supply and change the specialization if it stays healthy.
- Putting healing and defense in an attack macro→ A skill may trigger at the wrong time → Keep urgent actions on separate keys.
- Copying stat numbers from someone else's gear→ The threshold may not fit the boss or your bonuses → Check your hits and survivability in your own content.
- Locking a pet line too early→ Later rerolls cost more → Lock only a line you are ready to keep.
- Finishing a charged attack during a mechanic→ You lose health or fail the mechanic → Cancel the attack and reposition.
Build check
Compare setups against the same target over several attempts. Change one specialization, gear line, or macro setting at a time; compare the average result, MP use, forced pauses, and how easily you handle mechanics, not just your best lucky hit.
Checklist
Cleric ready
- I know who needs healing first and when to stop attacking;
- Healing Light, Radiant Recovery, and Defiance are assigned to separate, convenient keys;
- my stigmas fit my role: group, solo, or PvP;
- all four Global stigma slots are unlocked at levels 22/27/32/37;
- my Earth's Retribution option matches my MP supply;
- my macro is short and does not include healing, defense, or control;
- Daevanion strengthens the skills I use most often;
- my stats provide enough ATK, Accuracy, and survivability for the current content;
- my gear, Arcana, and pet breed support the same role.
Comments